Gamemaker studio 2.3: new gml features
Содержание:
ANIMATION CURVES
The next new feature we want to discuss here is a new top-level resource called Animation Curves. An animation curve is an asset that contains one or more curves that represent how a value changes over time, and can use linear interpolation or smooth interpolation to go between different points in the curve. The values you set can be between -1 and 1 (by default) on the vertical axis and the duration along the horizontal axis is always normalised form 0 to 1, making it easy to target different time ranges using multipliers in your game code.

Animation curves are comprised of «channels» and each channel can have its own curve settings, which permits you to — for example — describe a spacial position with two channels for the x/y position, or a colour gradient with 4 channels to represent a colour format. Animation curve assets can be used when working with sequences and can also be accessed using code, making them a powerful tool when creating your games.
SUMMARY
GameMaker Studio 2 is highly customisable and as such the sheer amount of preferences available can make editing them a little overwhelming. We hope that with this article we’ve shown you some of the most essential and useful of the prefs that you can edit to get the best workflow experience possible, but we do suggest that you take some time and explore the preferences fully, as there will certainly be things in there that we haven’t covered that you’ll find very useful!
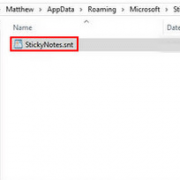
One final thing to note is that preferences are linked to the user that is signed in to the program, and so if you log out and another user logs in, they can set their preferences how they wish without affecting the ones you have set previously. So, the next time you log in to GameMaker, your preferences will be maintained. However, if you wish to save them somewhere safe — if you need to do a clean install or are installing GameMaker Studio 2 on a new computer — then you can find them in the following location:
This file can be saved elsewhere then copied over to the same location after installing GameMaker Studio 2 and logging in for the first time.
QUALITY OF LIFE PREFERENCES
These next preferences are what we would consider «quality of life» prefs, as changing them will not dramatically alter the ID, but they will adapt areas of it to your own preferred form of working and hopefully improve your workflow. To start with you should be aware of the different «fullscreen» options for some of the windows in GameMaker Studio 2. These can be found from the :

By default, when you open an object event, a shader asset or a script asset, these will be opened up as windows within the current workspace. However, this is not to everyone’s liking and many people would prefer that these code editors were opened on the fullscreen and not inside a workspace or chained to an object. Checking these prefernces does just that, and once you have applied the changes, opening any of the before-mentioned assets will open them in a new workspace tab that is a fullscreen text editor.
When using multiple windows in the GameMaker workspace, you’ll find that by default they cannot overlap and that trying to put one window on top of another results in the window being shifted up or down to accommodate the change in position. However, this is another minor issue that is not to everyone’s liking and so you have a to permit chains to overlap:

Another preference that you may want to change is the one that sets the different Directory Paths that GameMaker uses for temp files and cache files and other things. It may be that the drive you have installed GameMaker Studio 2 on has little space, or you want to use a different default path for your projects or something, and so you can change the preferences to different locations on your computer, as shown in the image below:

This next preference in is one that I know get’s overlooked a lot, but it can save a some users getting frustrated when programming in GML. By default, all code functions will use UK spelling when being shown in the code completion window — the most obvious example being «colour» but there are others, for example:
However, there is an option to have code complete functions default to the American English way of writing them, for example:
You can find this option from the preferences:

GML Usage
Finally, let’s talk about how tiles can be
used in GML. We’ll first need to understand the concept of Tile Maps.
Tile Maps
Each Tile Layer has a Tile Map attached to it,
and placing tiles on a layer puts them into its Tile Map. The Tile Map is what
you see in the Room Editor and in the game as well. It functions as a grid,
where each cell can hold a tile.
The Tile Map ID for a layer can be retrieved
using layer_tilemap_get_id():
There are many that you can run on the
returned Tile Map ID, to get a tile on the layer or to change a tile. For
example, you can run tilemap_get() to get the tile data at the given cell coordinates, or tilemap_get_at_pixel() to get the tile data at
the given room coordinates. There are similar “set” functions that can be used
to change tiles.
Tile Data
The tile data returned by tilemap_get() is usually the tile index, which is assigned to each
tile in a Tile Set starting from 0:
However, the returned tile data is only equal
to the tile index when it has no extra data. For example, you can apply rotation or mirroring to the tile data, and apply the
modified tile back to the Tile Map. Such a modified tile will not be equal to
the tile index anymore as it has extra data now.
To avoid such issues and get the correct tile
index from a cell, use tile_get_index() on the tile data returned by tilemap_get(). For example, let’s say
you want to check whether the player is standing on a water tile, and let’s
assume that the index for that tile is 4. You could do a check like this:
You could also create an enum to store your
tile indices!
ARRAYS
The first change to the GameMaker language that we want to discuss is a change to how arrays work. Previously, GML only permitted 1D or 2D arrays, eg:
However, this is no longer the case and now all arrays are 1D. So how do we create a 2D array now? Well this is done by chaining arrays together to essentially create arrays within arrays. Here is a small example:
The above is now a multi-dimension array with 2 dimensions to it, but you are no longer limited to just 2 dimensions and can create arrays of 3 or 4 or more dimensions as required, eg:
This change means that all platforms will now work the same (including HTML5) and enables much larger arrays, both in number of items as well as number of dimensions. The change also means that the following functions have been deprecated:
And the following new functions have been added:
Note that the old functionality (and the deprecated functions mentioned above) will still work but under no circumstances should new projects use the old syntax, as these will eventually be removed from the language.
Automatic Tile Imports
If you have an image of a level built using
tiles, such as a mockup, you can extract tiles from it using the “Convert Image
to Tilemap” option under the Room menu. This loads the given image into a new
Tile Layer, and also creates a new Tile Set that can be reused.
I loaded this image that shows a map built
using some tiles:
I had to adjust some properties in the
importer (such as tile size, starting position) and it then generated a Tile
Layer with the given image, and also created a new Tile Set asset with all
unique tiles:
Let’s go back to the Tileset Editor now and
look at its most exciting feature: Auto
Tiling!
Auto Tiling
Any Tile Sets that have different types of
terrain (like grass and dirt etc.) or walls/platforms can make use of Auto
Tiling to speed up the level designing process.
If you open the Auto Tiling menu from the Tile
Set Editor, you will see that it allows for two kinds of Auto Tile Sets: one
with 47 tiles, and another with 16 tiles:
You can click on the plus button next to
either of them to add a new Auto Tile Set.
16 Tile Set
The 16 Tile Set allows you to place two kinds
of terrains, as indicated by the light and dark areas in the template shown
above. These could be grass and dirt, grass or water, etc.
You can assign tiles from your Tile Set to
each template tile, and enable the overlay to make sure you’re selecting the
correct tiles:
The tiles are used when the corners of two
different tile blocks meet.
You can also make a Tile Set where the grey
parts are transparent, such as land tiles for a platformer game:
47 Tile Set
This is the lesser used Auto Tile Set,
particularly because it is more complicated and requires a larger amount of
tiles. If used correctly, it allows for narrower tiles and supports more tile
combinations. Here is an example of a Tile Set that can be used with the 47
Set:
Such a Tile Set can be used to create
intricate levels that use less tile space, as seen below:
SUMMARY
As you may imagine, this is a rather important update to GameMaker Studio 2 with a lot of new features and a lot of changes «under the hood» to make life easier and to make the product easier to use and more compatible with things like source control. We’ve said it already during in this blog post, but it’s worth repeating… read the manual! This is especially important when starting to use the new Sequences asset, as the editor has a lot to it and — especially if you are not an artist or have never used any kind of animation or video editing software — it can be a bit overwhelming to start with. However, we think this is an incredibly powerful tool and opens up GameMaker Studio 2 in a big way to people who are less experienced with code and who prefer a more visual approach to making games.
One final thing should be said about importing pre-2.3 projects. On importing a project made with a version of GameMaker Studio 2 prior to this update, you will be prompted to save the project again using a new name before continuing. This is absolutely essential as the changes made to the project file format are not backwards compatible and once you update a project to 2.3 it can’t be loaded into previous versions, so it’s a good idea to keep separate folders for pre and post 2.3 versions of any game you are working on.
Thanks for reading and we can’t wait to see what you all do with the new features!
Happy GameMaking!
STRUCTS
The next new feature that we want to discuss in GameMaker Studio 2.3 is the creation of structs. A struct is — to put it simply — a variable that holds a collection of other variables — you can think of it as a kind of «light-weight object». The variables that a struct holds can be of any data type and these variables can be read from and written to after the initial struct declaration, and you can also add more variables to a struct after it has been declared. It should also be noted that the contents of a struct are independent of the instance or script that created it, and as such you can — if you wish — use the built-in variable names like or and . One of the benefits of using structs is that (unlike instances), after the initial creation, structs have no processing overhead while they exist, although they will take up space in memory. The struct syntax is as follows:
So, an example of this in practice would be:
The above creates an instance scope struct in the variable «mystruct» and populates it with some values (structs can be created at local, instance and global scope, just like any other variable). Note that you don’t have to populate the contents of a struct when it is created initially and you can create an empty struct by simply doing this:
This struct can then be added to at a later point in the game code. Here is an example of a struct with various variables and data types:
You’ll notice in the above code that you can also define methods and use runtime functions in structs, and that you can use expressions consisting of any variable previously defined within the context of the struct itself, as well as any variable defined within the scope of the struct itself.
Once a struct has been defined, you can access the data within using the «point» notation, like this:
You can also perform operations on the variables within a structure or use them in functions, just as you would any other variable. For example:
Finally, structs can have other structs nested inside of them, like this:
To access such nested structs you would still use the point notation, like this:
When a struct is no longer required it can be removed from memory using the operator, which is another new GML feature added in the 2.3 update. This de-references the struct and hints to the garbage collector that it may be available for collection. This is not strictly required as the garbage collector may do this automatically in the following game steps if the struct is no longer referenced in your code, but it is good practice to do so and we recommend it (for example, call delete in the Clean Up event of an instance to explicitly tell the garbage collector that an instance scope struct is to be deleted).
Also note that structs can be created using functions, which requires the use of the operator and the keyword (two more new features to GML), as shown in the following example:
Here we are creating the function and telling GameMaker Studio 2 that this is a function for making a struct by adding the keyword after the definition. You can then call this function like this:
Now the variable v1 will reference a struct with the variables x and y and the static method variable .
Note that there are other additional functions for structs, specifically:
Check the manual for details of how these functions should be used.
ACCESSIBILITY PREFERENCES
To start with, let’s talk about the main options available to improve accessibility. The most obvious one is probably the IDE «skin». By default, the IDE uses a dark colour-scheme with a light grey on dark-grey palette. However, this may be problematic for some people and so in the part of the Preferences, there is an option to change the IDE skin to use a lighter colour-scheme with more contrast:

You can see the difference that this makes in the image below:

Another accessibility option available from this section of the Preferences is the DPi Override option:

Enabling this means that you can scale up (or down) the size of the text, icons and other IDE elements to suit your own specific needs, and you can set either the Raw DPi Override value or set the Percentage of the native DPi (they both affect the same thing and are just different methods of expressing the DPi value).
Once applied and the IDE has been restarted you should notice the change. The image below shows the difference between the default setting and a scale of 167%:

It’s worth mentioning that you can also change the scale at which assets are displayed in the Asset Browser independently of everything else by using the slider at the bottom, which will affect both the image/icon used to represent the assets as well as the text name of the assets:
You can also independently scale the size of the different Action Icons when using Drag and Drop, from the :
![]()
The next thing we’ll mention when it comes to accessibility is the Slow Double Click Time. You can find this option from the Input Preferences:

Many areas of the IDE permit you to use a slow double click on the left mouse button to change things, for example renaming an asset. However the timing may be awkward for some people and so you can adjust this setting here making it easier to achieve the double click. It’s worth noting that some of the other options in the Input section may also be helpful in terms of accessibility so you should check them out too.
The final thing we want to mention for the different accessibility preferences is the ability to change the colour, font, and font size of the different window texts in the IDE. You can change the font details and the way code is coloured from the preferences, you can change the way text id displayed and coloured in the different Output Windows from the preferences, and you can also change the font and colour of Drag and Drop comments from the preferences.
Collision Checking
Tile collisions mostly involve checking if
there is a tile at a given position, but it also depends on how your Tile Map
is set up. The easiest way is to assume all tiles in a Tile Set are collidable,
so if there’s a tile, there’s a collision, otherwise there is not. This makes
our check this simple:
However, if there are only some tiles in your
Tile Set that need to have collisions, then you need to read the tile’s index
as well and make sure that it is the tile you want (like we did in the water
tile example above).
Now this only covers checking for one point,
however instances have a bounding box. My usual solution for that is to check
for tiles at all bounding box corners:
Keep in mind that this could cause issues if
there were a tile smaller than the instance’s bounding box, as it could just
pass between the corners. To work around that you can add more checks in the
middle of each bounding box edge.
SUMMARY
Well, we’ve come to the end of this rather long blog post, and as you can see we’ve been working hard to improve the GameMaker Language and bring it up to par with other more common programming languages, We hope that these new features are of use to you, and that they help your workflow and enable you to make bigger and better games! Note that all the features discussed here are available from GameMaker Studio 2.3 onwards, and we recommend that you read the manual fully before using any of them, as there are details and nuances related to their use that we just haven’t got the space to talk about here. Also note that the 2.3 update includes a number of changes and improvements to the GameMaker Studio IDE which we’ll discuss a separate blog post.
Happy GameMaking!
Преимущества и недостатки
Стоит учесть, что эта программа – уникальный продукт. Обычно для создания качественной игры требуется целый набор дорогих и профессиональных программ. А здесь все инструменты объединены в одном приложении. И это первое преимущество, но есть и другие:
- Простой и понятный процесс установки.
- Для создания полноценных игр не обязательно изучать язык программирования.
- Интуитивно понятный и полностью настраиваемый интерфейс.
- Беспроблемная работа на ноутбуках.
- Оптимизированная работа с Windows 10.
- Есть обучающий материал.
- Отличная поддержка от разработчиков.
- Универсальность продукта (нет нужды использовать дополнительные программы).
- Кроссплатформенность (имеются версии приложения для Windows и MacOS).
Русификатора для этой программы нету, и вряд ли предвидится. Это единственный недостаток Game Maker Studio 2
Если не брать во внимание высокую стоимость лицензии. Однако в руках пользователя оказывается уникальный инструмент для создания игр
За это многое можно простить.
GMS 2 требует некоторых навыков в создании компьютерной графики. Но встроенный графический редактор программного продукта настолько прост, что с ним в считанные часы разберется даже новичок. Простота в создании игр – еще одно преимущество продукта перед профессиональными (и очень сложными) программами.
Возможности
Структура игры, созданной в программе Game Maker, состоит из набора разнообразных объектов. Их дизайн редактируется с помощью спрайтов, а поведение описание реакции на те или иные действия игрока. Процесс создания напоминает работу с блок-схемами и использует режим drag-n-drop (перетаскивание специальных иконок с действиями в ячейки событий). Для совсем опытных юзеров создан свой собственный язык GML (напоминающий JavaScript). Он поддерживает синтаксис популярных языков (PHP, JS, Pascal), поэтому для написания кода можно использовать один из них. Это значительно расширяет возможности пользователя.
Программа имеет встроенный редактор позволяющий настроить поведение и внешний вид объектов, создать различные цели, которые надо выполнить игрокам, задать время для этого.
Обновление добавило поддержку HTML5. Это позволило разрабатывать приложения не только для компьютеров и мобильных телефонов, но и интернет браузеров.
Основные возможности:
- создание двухмерных игр без знания основ программирования;
- возможность использования режима drag-n-drop (дословный перевод – перетаскивай и бросай);
- использование собственного скриптового языка GML (Game Maker Language), похожего на JavaScript;
- создание собственных библиотек действий с помощью Library Maker.
Быстро и без особых усилий можно создать простую игру со своими правилами и целями. Благодаря этой программе пользователь может получить новые навыки и проявить творческие способности, даже без глубоких знаний языков программирования. Специалисты используют дополнительные скрипты, чтобы расширить возможности GM. Начинающие программисты используют ее для расширения своих знаний и получения опыта в сфере создания игр.
Встроенная система звуков поддерживает различные форматы аудиофайлов, но дополнительно созданы специальные DLL библиотеки. Можно добавлять фоновую музыку или эффекты.
Системные требования очень простые и позволяют запустить GM на системах с операционной системой Windows XP и выше. Качественный русификатор позволит без проблем использовать все возможности и функции, а простой и дружественный интерфейс – быстрее разобраться даже неопытным пользователям.
FUNCTIONS, SCRIPTS AND METHOD VARIABLES
Above we outline some changes to the GameMaker Language, but now it’s time to talk about the good stuff… what’s been added! To start with we want to talk about in-line functions and scripts. Previously, a script was a single resource that was created on a global scope and used to create a single custom function which would then be called using the script name as the function name. This is no longer the case and scripts, while still global in scope, are now a type of «container» for one or more functions.
What this means is that when you compile your project, scripts are no longer called individually, but are actually all run at the start of the game in the global scope, so all variables that are defined in the script (outside of function definitions) will be considered global. That said, you should still use the identifier to explicitly define and identify global variables in your code.
The reason for this change is that scripts can now contain multiple functions. If you’ve only used GML to code projects then the idea of functions may be something new to you, but think of them as being the same as scripts, only explicitly assigned to a variable. This variable is called a method and is used to call the code that is in the function, the same as you would have previously called the script name. This is easier to visualise with an example, so let’s look at one. Consider this simple script :
Now, however, this would be defined as a function like this:
or like this:
You would call this function just as you would have called the script:
So, as we mentioned above, scripts can now contain multiple functions and these should be defined with the format shown above where you have the JS doc comment to identify the function, then the function definition below, and then the next JS Doc comment, and then the function, etc…

Above, we briefly mentioned that functions as variables were called method variables, but it should be explained in a bit more detail. Basically, when you create a function with a variable like this, you are creating a method variable, and they can have different scopes. Consider this function:
-
In the case of a script a variable called «foo» is declared at global scope
-
If the function is declared in an event then the variable «foo» is on the instance that ran that event
-
If the function is declared in an event using the keyword then the variable «foo» is local to the event only
-
If «foo» is declared inside a then it is declared on the that is active at that time
This means that if you have some code that you need to use only within a loop in an alarm event (for example), then you can define it as a local scope method variable at the start of the event and then use it within the loop without the need to clutter up the script assets with it.
It is worth noting that while the variable will be in the chosen scope, the actual function will be bound to the scope that it was initially defined in. Going back to script functions, these are all global scope and are considered «unbound» (ie: they are not associated with any instances), but if you have a script function that creates another function within it and then you call this script from an instance, the function used within the script will be bound to the instance. In general this is not something you ever need to think about but for more complex operations with method variables it’s worth taking into consideration. This also applies when using other constructs like — when you create a method variable inside a , the function will be bound to the instance that is currently in scope.
The following new functions have also been added to deal with methods:
Check the manual for details fo how these functions should be used.
RPG Maker
История одного из самых знаменитых конструкторов ролевых игр началась ещё в конце 1980-х. Более поздние версии для Windows, созданные японскими разработчиками, получили широкое распространение на Западе. Сегодня популярность движка достигла таких масштабов, что тег RPG Maker в Steam представляет уже не столько игры на самом движке, сколько собирательный образ тематического направления в геймдеве. Этот феномен легко объяснить.
RPG Maker используют преимущественно для создания JRPG в стиле ранних частей Final Fantasy. Сам жанр требует огромного количества ресурсов: локаций, персонажей, мобов и так далее. Большинство тех, кто работает в RPG Maker, используют дефолтные шаблоны движка, дополняя их собственными персонажами и иллюстрациями. Иногда даже NPC в этих играх созданы только с помощью генератора. Поэтому игры на RPG Maker, как правило, выглядят очень однотипно. Лень тут ни при чём: у большинства инди-разработчиков просто нет времени, навыков и ресурсов, чтобы сделать всё с нуля. А готовые системы сохранения, боя и интерфейс тяжело изменить. Даже если потратить на кастомизацию достаточное количество времени, мелкие детали в интерфейсе всё равно выдадут RPG Maker.
Сейчас существует несколько версий редактора. Последняя — RPG Maker MZ — вышла в 2020 году. Базовая версия обойдётся в 1 389 рублей. Также не стоит забывать о DLC с наборами тематических ассетов, которые наверняка потребуются начинающему разработчику.
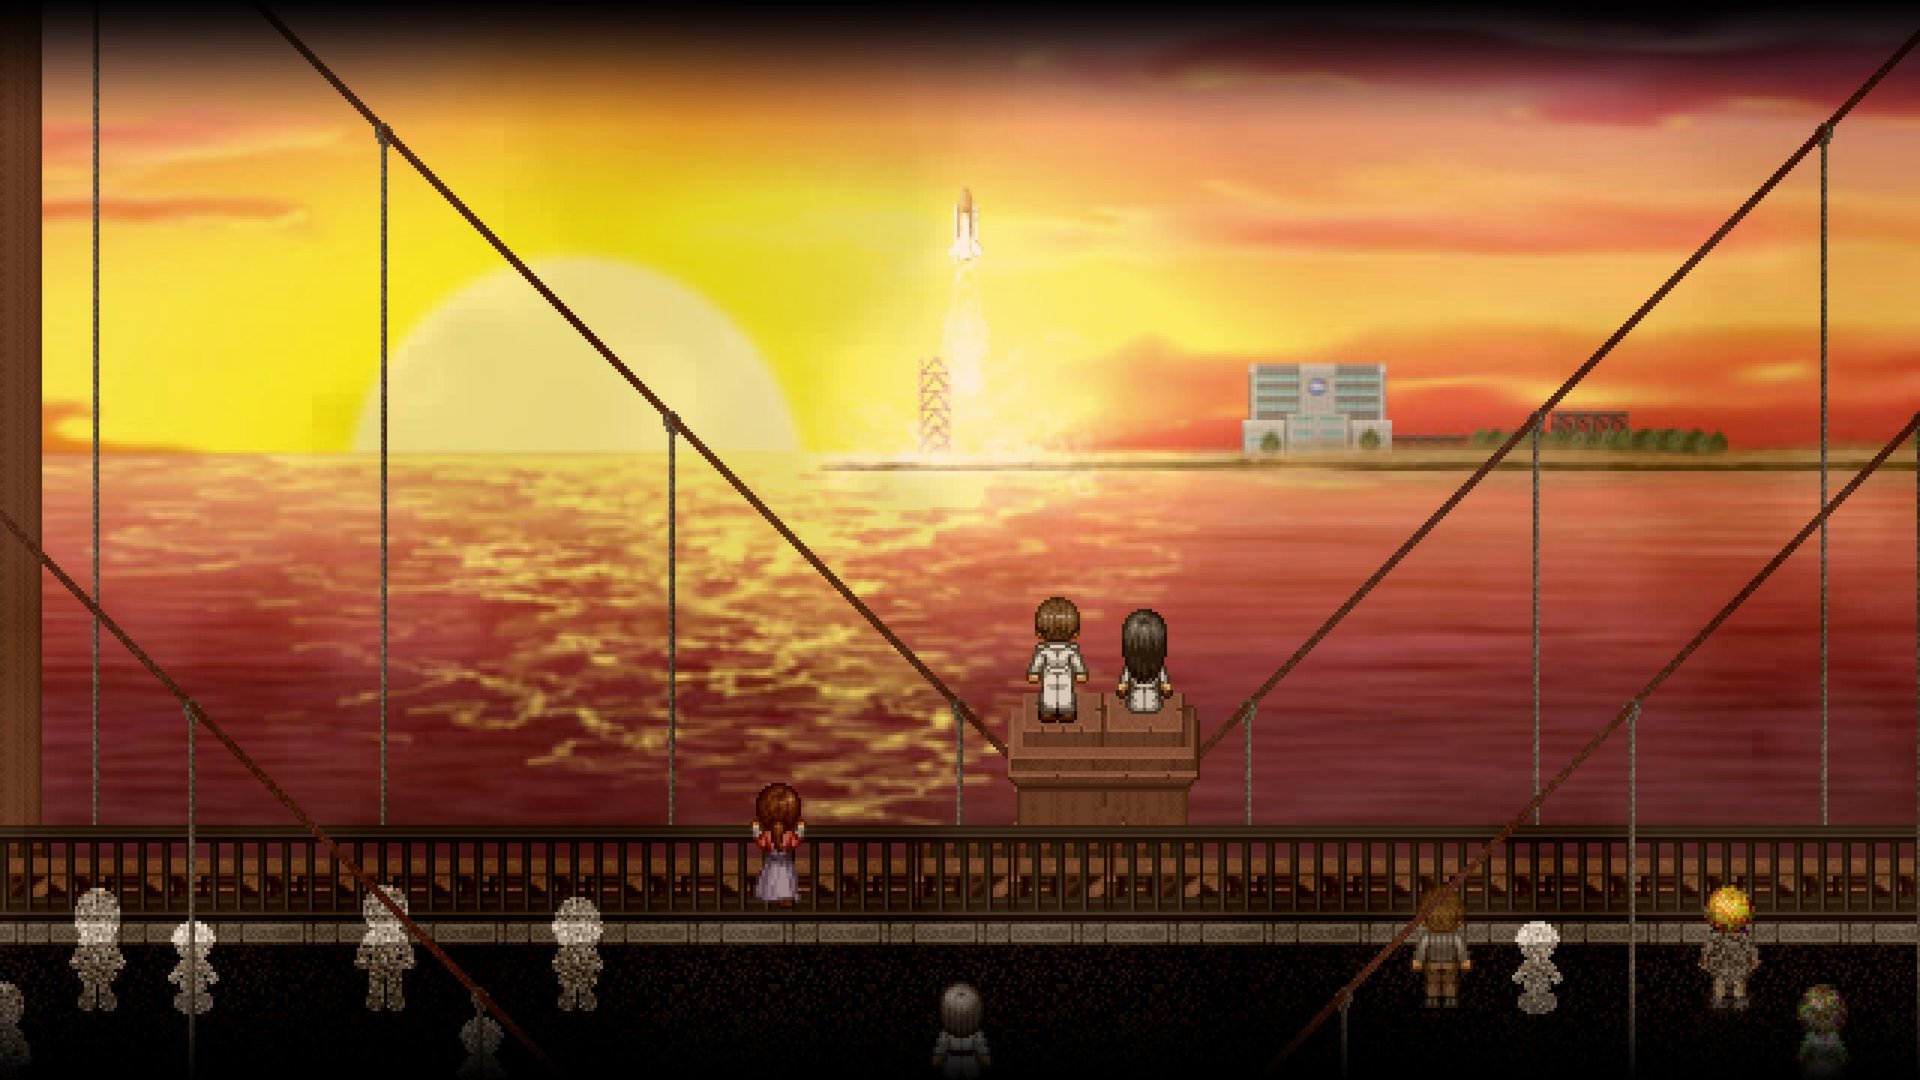
Скриншот из To the Moon — игры, созданной на RPG Maker. Скриншот: игра To the Moon / Steam
Преимущества:
- не требует навыков программирования, более опытные разработчики могут оценить гибкость движка с помощью JavaScript;
- кросс-платформенность (Windows, Mac OS X, HTML5; iOS и Android — в RPG Maker MV);
- огромное количество плагинов: игру можно сделать фактически с нуля без помощи художников и композиторов;
- на тематических форумах есть бесплатные ассеты.
Недостатки:
- большое количество ассетов и DLC, которые следует докупать отдельно;
- неоправданно большой «вес» проектов: согласно порталу gamedesigning.org, игра занимает от 400 МБ независимо от количества контента, к тому же конструктор нередко создает резервные копии, засоряя жёсткий диск;
- если перемудрить с ассетами, игра начнет тормозить — выявить причину будет непросто;
- портирование на мобильные платформы может сопровождаться неприятными багами.
Игры на движке: To the Moon, Hello Charlotte, Grimm’s Hollow, Lawmage Academy.
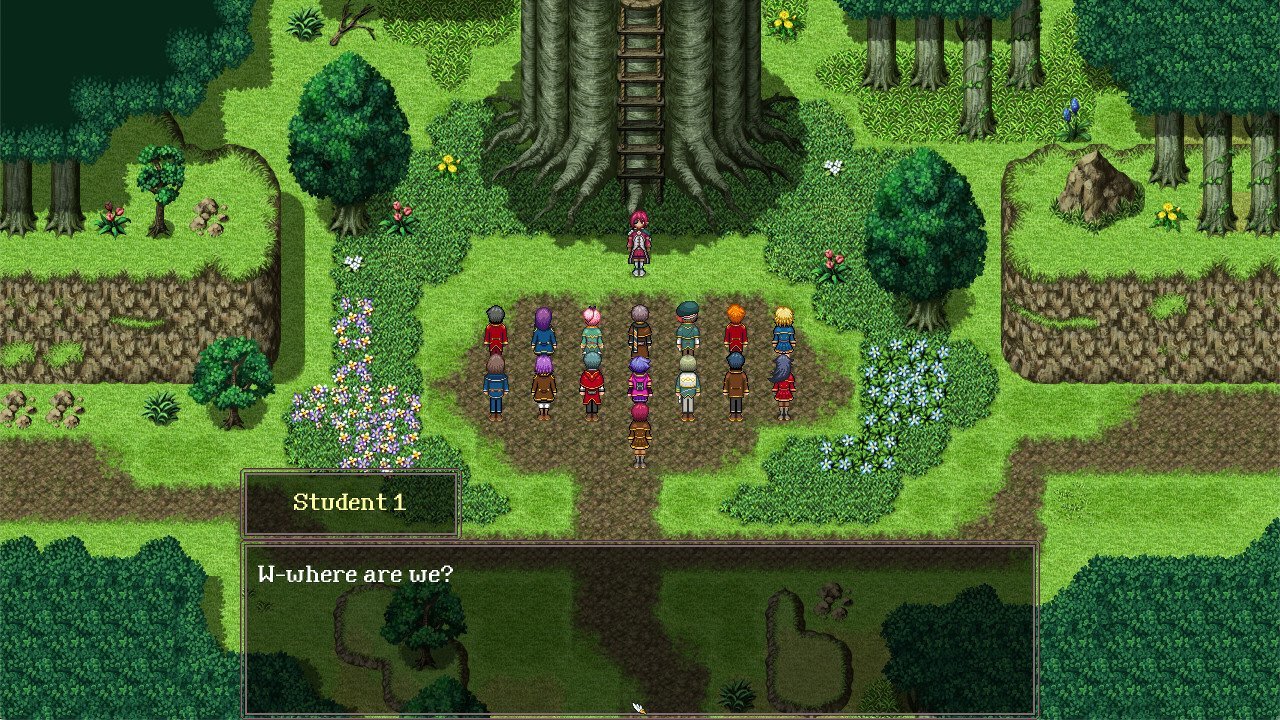
Скриншот из Lawmage Academy — игры, созданной на RPG Maker. Скриншот: игра Lawmage Academy / Steam
«Мне хотелось сделать добротную двумерную RPG с приятным геймплеем, хорошей боёвкой и презентабельным визуалом. Я понял, что мне не хватит опыта и бюджета для работы с Unity 3D или UE4 (если не считать работой сборку игры сомнительного качества из готовых ассетов), поэтому я остановился на RPGMaker, тем более что мне уже доводилось с ним работать. Это замечательный инструмент, но, к сожалению, за годы у него сложилась репутация конструктора плохих игр, которые порой бывают даже хуже, чем поделки на Unity. Отчасти это связано с простотой его использования. Практически любой желающий может сразу создать игру на RPG Maker, достаточно посмотреть пару обучающих видео. Однако реальные возможности движка сильно ограничены: на нём можно сделать только JRPG в стиле Final Fantasy, для иных жанров потребуется масса плагинов, а ещё предстоит потратить время на работу с кодом».
Manly Mouse Studios, инди-разработчик (The Singularity Wish). Дневник разработчика, октябрь 2019 года

Скриншот из The Singularity Wish — игры, созданной на RPG Maker. Скриншот: игра The Singularity Wish / Steam
«RPG Maker действительно очень простой движок. Его простота и доступность привели к тому, что на нём появилось огромное количество „мусора“, в том числе порнографического содержания. Из-за этого многие геймеры терпеть не могут RPG Maker. И эта дурная слава будет преследовать даже качественные проекты. Игры на этом движке очень узнаваемы. Ещё могу отметить тот факт, что движок подходит для создания пошаговых RPG и даже квестов. Игры других жанров в теории тоже можно сделать (я даже видел симпатичный beat ’em up), но это равносильно забиванию гвоздей отвёрткой вместо молотка».
Кирилл Пестряков, инди-разработчик (Heroines of Swords & Spells)
Скриншот из Heroines of Swords & Spells — игры, созданной на RPG Maker. Скриншот: игра Heroines of Swords & Spells / Steam
Заключение
Пришло время подвести итог для всех трёх материалов цикла. Чек-лист из шести пунктов, представленных ниже, поможет вам определиться с выбором движка для будущей игры.
Временные рамки
Обозначьте для себя сроки разработки. Если это игра вашей мечты, возможно, на её разработку уйдут годы. В этом случае стоит задуматься о движках, поддерживающих масштабные проекты (Unity, UE4, CryEngine). Но если в вашем распоряжении несколько месяцев, можно присмотреться к GameMaker или Construct 3 и сделать головоломку или платформер.
Бюджет
Некоторые игры предполагают финансовые затраты уже на старте, когда нужно приобрести движок (RPG Maker, GameMaker, Construct). В других случаях предстоит вложиться в покупку ассетов (Unity, UE4) и быть готовым выплачивать роялти. Что касается бесплатного контента, то здесь нужно быть особенно внимательным: иногда для использования требуется разрешение автора.
Личные навыки
Многие мечтают сделать собственную игру, но их останавливает отсутствие навыков программирования
В этом случае стоит обратить внимание на движки с визуальными скриптами и упрощённым подходом к коду (Clickteam Fusion, Ren’Py, Construct 3, UE4, GameMaker Studio)
Команда
Здесь всё зависит от масштаба. С какими-то технологиями проще работать в одиночку (GameMaker Studio, Construct 3, RPG Maker), в то время как для работы в других движках может потребоваться несколько человек (Unity, UE4, CryEngine).
Жанр
Существуют движки, которые специализируются на конкретных жанрах. Чтобы определиться с выбором, необходимо проанализировать, какие хиты сделаны с помощью той или иной технологии. Например, RPG Maker славится удобством в построении JRPG с пиксель-артом, на Construct сделано много платформеров, а на Unity и Unreal немало проектов с впечатляющей 3D-графикой.
Выбор платформы
Как правило, начинающих разработчиков волнует только процесс создания будущей игры, но мало кто задумывается о дальнейшей оптимизации, балансе и исправлении багов. Большую роль в этом играет масштаб проекта. Такие движки, как UE4, Unity и CryEngine, подходят для крупных проектов, но оптимизировать игру на них будет сложнее.
Выбор платформы не менее важен. Если для релиза на PC можно использовать практически любой движок, то поддержкой сторонних платформ могут похвастаться не все технологии. Для браузерных проектов подойдут Phaser 3 и Construct 3. Для мобильных приложений AppGameKit, Solar 2D и Cocos. Стоит учесть, что многие движки мультиплатформенные.
Не бойтесь экспериментировать. Даже если о каком-то движке, упомянутом в этом материале, вы слышите в первый раз, не стоит его игнорировать. При правильном подходе, достаточном опыте и целеустремлённости любой из них может стать мощным инструментом для достижения вашей цели.