Media creation tool для windows 7
Содержание:
- How can I use Windows 11 Media Creation Tool?
- What You Will Require?
- Windows 10 Installation Media Tool
- Upgrade to Windows 11 using Media Creation Tool
- Download Windows 11 Media Creation Tool
- What is Media Creation Tool?
- Новая материнская плата? Потеря Windows
- How to use Media Creation Tool
- Некоторые особенности работы
- Create Installation Media For Another PC Option
- 4 Выборочная установка
- Use Windows Media Creation Tool to Upgrade Your PC
- Объяснение: средство создания мультимедиа для Windows 10 (2021 г.)
- Выводы статьи
How can I use Windows 11 Media Creation Tool?
1. Try it as an upgrade tool
- After you downloaded the tool from the Microsoft Store, run it, then choose to Upgrade this PC now, and click on Next.
- Wait a few seconds until your OS is completing the process. Note that this also depends on your PC’s capabilities and internet speed.
- Your operating system will also check settings and configurations.
- After this, choose to keep your personal files and apps. For a clean install you should click on the Change what to keep option, then select the files you got to remove.
- Your PC will restart and will power on the latest Windows 11 OS.
2. Use it as a bootable USB tool
- To simply do it, you should open the downloaded tool, choose to Create installation media, instead of Upgrade this PC now, then click on Next.
- It will automatically populate the configuration of your computer. If you need to change it you can uncheck the Use the recommended options for this PC option and make the necessary changes and click Next.
- Select the USB flash drive option, then click on Next.
- Insert a USB flash drive, with a minimum of 8 GB, then the tool will automatically detect it.
- The creation of Windows 11 OS installation media will begin.
- Once it is finished you will get a Windows 11 bootable USB.
For more information, check out this guide on how to make a bootable USB drive for Windows 11.
In addition, because protection is mandatory, take a look at the best antivirus software for USB flash drives. Choosing one of these options will keep you away from infecting with malware or other harmful threats.
3. Try it using an ISO file
- Follow the same two steps as in the above solution.
- Instead of the USB flash drive option, choose ISO file, then click on Next.
- Follow the on-screen instructions.
If there are times when you need to run Windows 11 on VM, this option represents an important step in achieving your goal.
Note that if you choose the ISO file option, the Windows 11 ISO file will be downloaded. You can later burn it using certain burning tools.
Check out the best software to create and open ISO files, then decide which one suits you the most.
Also, you should take a look at how to burn ISO files in Windows 10. Considering the latest OS model works similar to the previous one, this article will surely help you.
Why should I use the Windows 11 Media Creation Tool?
You’ve seen how Windows 11 Media Creation Tool can be used, but let’s see now what its real advantages are. The following aspects really matter when it comes to creating a unique digital experience:
- Files protection – This tool won’t change any of your files while upgrading your PC or laptop to the latest version.
- It is quite easy to use – If you correctly follow an efficient guide, your OS will be upgraded without consuming time.
- No cost – It is a free utility developed by Microsoft, so you won’t have to pay for it.
The above solutions will guarantee important help in your future Windows 11 activity. As you see, the Media Creation Tool is great and can reduce your effort considerably.
Because your opinion matters the most, you should share it with us by leaving a comment in the section below.
Was this page helpful?
1
MyWOT
Trustpilot
Thank you!
Not enough details
Hard to understand
Other
x
Contact an Expert
Start a conversation
What You Will Require?
Before we continue with the guide to using Windows 11 Media Creation Tool, let’s discuss a few things that you will need throughout the process. There are certain things that you require to continue with the process of upgrading Windows with the media creation tool.
- Ensure you have a computer to install Windows.
- Take a backup of your data before you continue with the process. In case of data loss, you can easily restore the data if you have a backup of it.
- Ensure you have a stable internet connection. You will need a good speed internet connection to download Windows and then upgrade your Windows or create a bootable USB drive.
- Ensure you have a USB drive with at least 8GB of storage. You will need this if you are not upgrading your Windows but creating a bootable USB drive from the Media Creation tool.
Windows 10 Installation Media Tool
To download the Windows 10 Installation Media Tool, visit Microsoft.com and scroll down till you see two purple Download Tool Now buttons.
The Windows Media Creation Tool will allow you to download the Windows 10 ISO directly from Microsoft, without having a product key. You can use it to clean install or Upgrade to Windows 10. It can be used to download the following editions of Windows 10 – Windows 10 Home, Windows 10 Home N, Windows 10 Home Single Language, Windows 10 Pro and Windows Pro N.
The tool includes file formats optimized for download speed, built-in media creation options for USB & DVDs, and allows for optional conversion to ISO file format. There are two versions of the tool available – a 32-bit version and a 64-bit version. Download the appropriate version of the tool and run it.
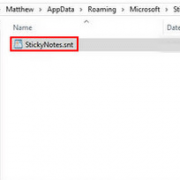
When you run the tool, it creates two directories on your system partition – $WINDOWS.~BT and $Windows.~WS. These folders contain the downloaded setup and installation files, and an option to resume the creation process if it fails.
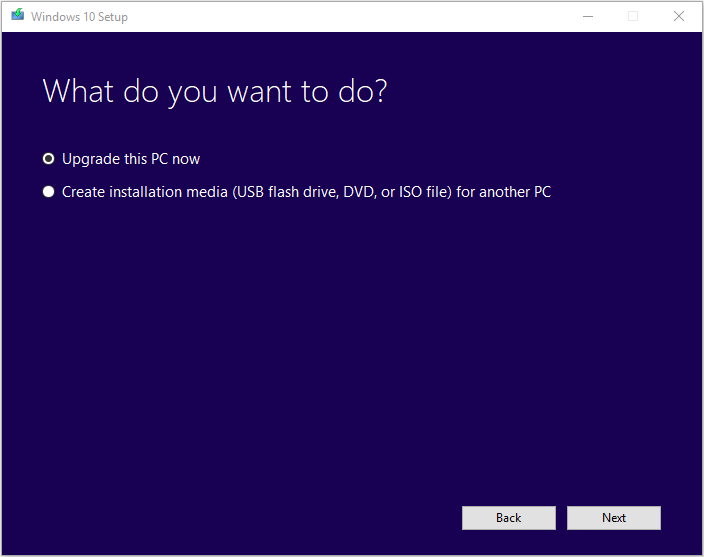
When you click on it to run the tool, you will see the following screen asking you if you want to Upgrade this PC now or Create installation media for another PC.
If you click on Create installation media for another PC, you will see a screen asking you to choose the media to use. You may use a USB Flash Drive which is at least 3 GB, or you can create an ISO file, which you can burn to a DVD later if you wish. I chose to create an ISO file.
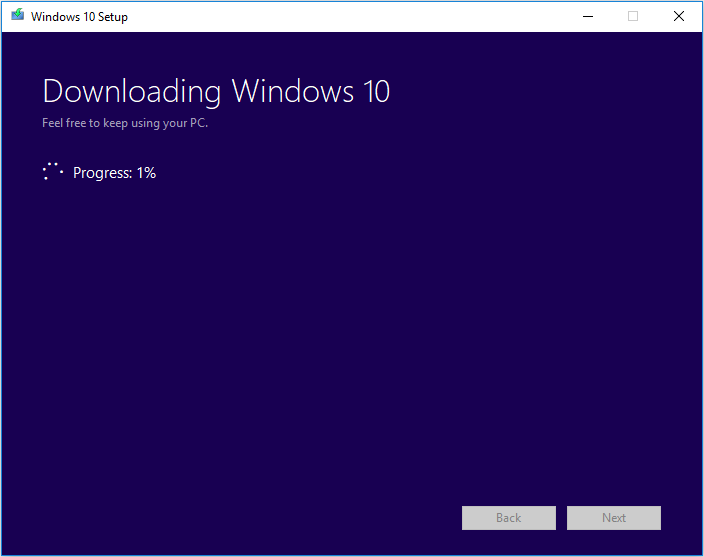
In any case, once you click on Next, the downloading of Windows 10 will start.
The tool will then soon automatically start creating Windows 10 media.
Once the ISO file is ready, you will see two options. One is to open the location where the ISO file has been saved and the other to Open a DVD Burner software to burn the ISO to disc.
I chose to open the ISO folder and run the setup file inside it to perform an in-place upgrade of my Windows 8.1 to Windows 10.
The upgrade process went smoothly, except for one thing…
Something happened when installing Windows 10
I received a Something Happened error screen. I closed the screen and restarted the setup. It worked, and I was able to smoothly upgrade Windows 8.1 to Windows 10.
If on the other hand, you select Upgrade This PC in the first screen, as mentioned above, and click on Next, you will see the following screen.
Select your Language, architecture, and edition and click Next. The upgrade process will begin directly.
TIP: See this post if you receive any Windows 10 Media Creation Tool Errors.
Related reads:
- How to create a Windows 10 bootable USB on Linux
- How to create a Windows 10 Bootable USB on Mac.
Our next post takes you through a screenshot tutorial which shows how you can clean install or Upgrade to Windows 10, using Windows 10 ISO file you created here.
This post will show you how to install any version of Windows from one USB flash drive. You can also download Windows 10 Enterprise ISO with Media Creation Tool.
Upgrade to Windows 11 using Media Creation Tool
Chandan Pandit
October 6, 2021 1:02 PM
Windows
The stable build of Windows 11 has started rolling out to eligible Windows 10 PC users. Windows 11 brings many improvements over the normal Windows 10 such as a new redesigned home interface, a new Microsoft store with native support for Android apps, a re-touched taskbar and icons, and more. Many users are willing to try Windows 11 on their PC. Well, for those, Windows 11 Media Creation is a helpful tool. The Media Creation tool can upgrade its system to Windows 11 seamlessly.
The Windows Media Creation tool allows users to sideload Windows 11. It’s more like flagship a custom ROM in Android with the help of TWRP recovery. For some sets of people, the creation tool is easy to use and operable, but it might come out as a bit complicated for beginners. So, in this post, we’ll be deciding on how to upgrade your system to Windows 11 using Windows 11 Media Creation Tool.
Important steps before proceeding
- After installing Windows 11 using the Media Creation tool, all of your user data might get cleared. So, make sure to take the backup of your data, so you won’t face any problem if your user data gets cleared.
- A good network connection is always recommended. It’s must require to install Windows 11 and to create a bootable USB Drive.
- If you’re creating the bootable USB instead of installing Windows 11, a USB Drive with a minimum of 8GB of RAM is always suggested.
Download Windows 11 Media Creation Tool
- Visit Microsoft’s Software Download Page and get the latest Media Creation Tool.
- Alternatively, you can download the MediaCreationToolW11.exe file through this direct link.
The media creation tool will be downloaded successfully in minutes (depending upon your network speeds).
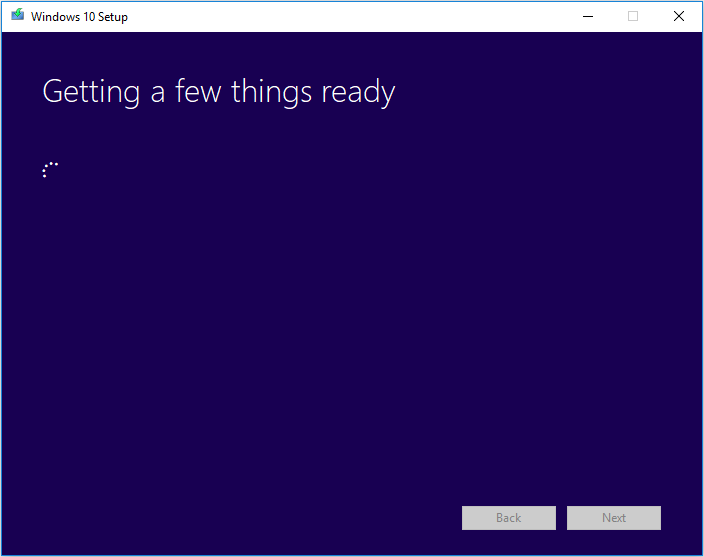
After installing the file, run it on your PC system. After this, you’ll get a prompt saying “Getting a few things ready!”.
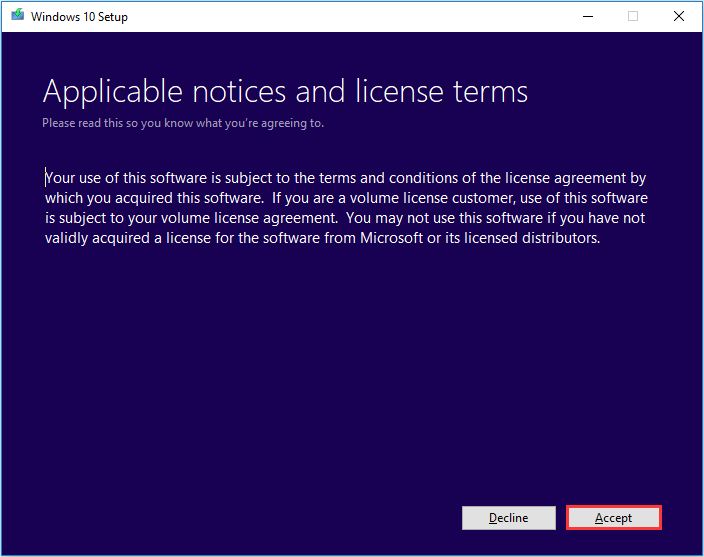
Accept Microsoft Software license terms.
Now select language and edition or Tick “Use the recommended options for this PC”

Now, you’ll see two options: “USB Flash Drive (It needs to be at least 8GB)” and “ISO File (You shall need to burn the ISO file to a DVD later)”.

You can choose the option accordingly, the USB flash drive option will create a bootable USB drive for you. And if you choose the second option i.e. ISO File, you will be able to burn the ISO file later to create a bootable USB drive or a DVD.
- If you select the “USB Flash drive” option, then make sure to connect the USB. The tool will automatically download and burn into the USB connection. And you can flash it later.
- For the “ISO File” option, it will download the ISO file of Windows 11 and you’ll later have to burn it using any third-party apps like Rufus to make it bootable.
We recommend you to use the “USB Flash Drive” option here, as it is easier to use.
So, if you want to perform a reinstall or clean install of Windows 11 on your PC, Windows 11 Media Creation Tool will be the best option as you can make a bootable USB or DVD.
Upgrade the PC Now with Windows 11 Installation Assistant
Do you want to upgrade your Windows 10 PC to Windows 11? Then Windows 11 Installation Assistant tool will be the best option. The tool will start downloading the Windows 11 File and upon downloading successfully, you will be able to install it in your system. After successful installation, complete the setup and you will be now able to run Windows 11 in your system seamlessly. If your PC does not support Windows 11 then you can follow this Bypass Method.
Download Windows 11 Installation Assistant tool from here

Ready to Install
After creating the bootable Windows 11 via Media Creation Tool, plug the USB Drive in which you’ve installed the bootable file. Boot the PC into BIOS and install the system. You can now use Windows 11 seamlessly if you have followed all the steps mentioned above correctly. You can read our “types of Windows 11 product key”, “Password Reset”, and TPM 2.0 Bypass” article here.
What is Media Creation Tool?
Windows 10 Media Creation tool has two functions:
- Upgrade the PC which has already installed Windows 10
- Create installation media (USB flash drive, DVD) for another PC or simply download the latest Windows 10 ISO file.
Windows Update Assistant is another tool which can be used to upgrade the PC seamlessly but I prefer the media creation tool. If you want to upgrade your PC to the latest version of Windows 10, you should select the first option. And if you want to create a bootable USB/DVD, then you should select the second option.
The only problem with the Media Creation Tool is that it will try to download the Windows 10 setup every time you want to create a bootable USB/DVD. This is the default behavior.
Новая материнская плата? Потеря Windows
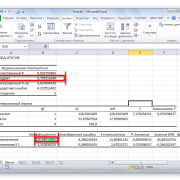
При активации Microsoft сразу связывает лицензию ОС с уникальным кодом различных компонентов вашего ПК, называемым также Product ID. Благодаря этому становятся возможным обновления и возможные переустановки Windows 10 на этом компьютере в будущем. Однако существует риск отказа системы из-за слишком большого количества замененных системных компонентов.
После покупки нового жесткого диска или же обновления BIOS «десятку» придется активировать заново — это мы поняли во время тестирования. Однако все иначе в случае с материнской картой: после замены этого критического компонента Windows 10 больше не может быть активирована на этом компьютере. Необходимо покупать лицензию или же сначала установить старую версию, а уже с нее провести обновление до «десятки».
Этот метод, впрочем, работает только с Retail-вариантами с ключом в комплекте. Если же у вас OEM-версия, а материнская плата от того же производителя, что и ПК и была заменена в рамках ремонта, необходимо к нему же и обратиться. Производитель несет ответственность за восстановление прежнего состояния вашего компьютера.
How to use Media Creation Tool
Let’s go through the process of upgrading from Windows 10 Version 1903 to Version 1909 using Windows 10 Media Creation Tool 1909.
For specific version tool, you can use the following direct download links:
Advertisement
2- Running the setup
Once downloaded, run the file MediaCreationTool20h2.exe. This will open a new window which will take some time “Getting a few things ready”.
Getting a few things ready
You will need to accept the license terms from Microsoft.Windows 10 Setup terms of use
3- Choose your option
After accepting the license terms, you will be presented with two options:
- Upgrade this PC now
- Create installation media (USB flash drive, DVD, or ISO file) for another PC
Windows 10 Media Creation Tool options
The upgrade option is checked by default. If you want to upgrade your Windows 10 to the latest version, then you should select this option.
Once you press the Next button while selecting the first option, you will be taken to a new screen which will show you the progress of Windows 10 download from Microsoft servers.Downloading Windows 10
4- Upgrading PC
Once the download is complete, the setup will ask you whether you want to download the latest security updates and install them along with the feature update. You can download the updates now or leave it for later as Windows will automatically download them after installation.
When asked, please select Keep personal files and apps. This makes sure that your files and applications remain safe.
5- Install Windows 10 Version 20H2
Once you hit the Next button, Windows 10 Version 20H2 will start installing. once the installation is complete, you will be required to restart the system. If everything goes well, you can login to the updated version of Windows 10. Otherwise, if the setup fails for any reason, you will revert to the version of Windows which was installed before upgrading.
6- Create installation media
In step no. 3, if you selected the second option then you will be greeted with a similar screen but you will need to select Windows 10 language, edition, and architecture.Select language edition and architecture
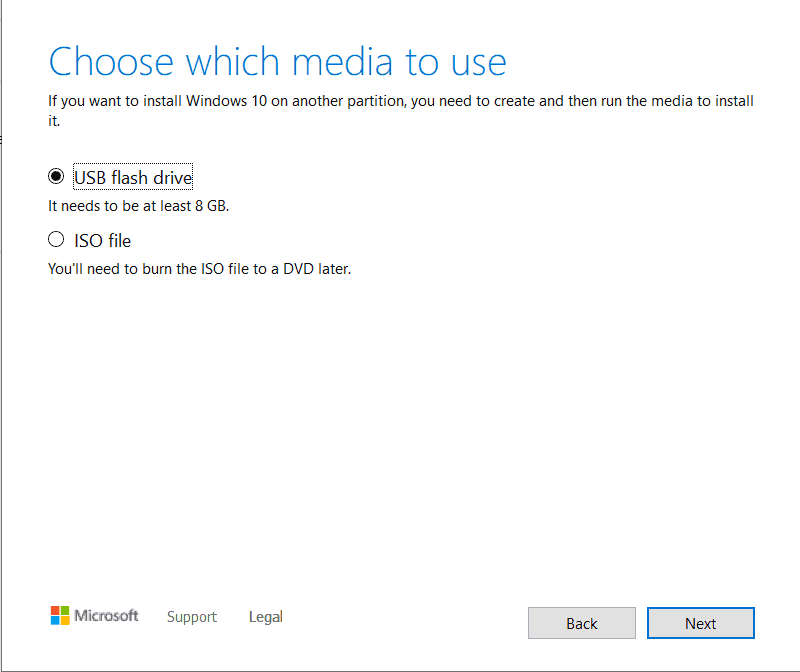
Next, you will have two options:
- USB flash drive
- ISO file
Choose which media to use
If you want to directly create a bootable USB drive, then select the first option. You will need USB/DVD storage of at least 8 GB.
If you want to download the ISO file, then select the second option. You can create a bootable USB drive from the ISO using Rufus.
Pressing the Next button will start the download process.
You can also download Windows 10 ISO directly.
Also see:
Некоторые особенности работы
Внешний HDD, приобретает файловую систему FAT32. Что предпринять? Нажимаем «Win+R», далее пропишите команду «diskmgmt.msc», для перехода к утилите управления дисками.
Отобразятся все разделы диска. Отформатируйте его.
Программа не видит флешку
При работе появляется сообщение, что USB-накопитель не найден. Эта ошибка актуальна для Windows 7/10 разрядности 32/64. Что предпринять? Скачайте утилиту предыдущей версии, например, 10.0.14393.0 Некоторые флешки определяются в качестве накопителя, а как жесткий диск не распознаются. Отформатируйте ее в FAT32 через командную строку. Про это подробно описано в статье: «Как отформатировать жесткий диск? 4 четких способа!».
Проверка устройства на наличие ошибок
Откройте его в новом окне. Далее выбираем командная строка с правами администратора. В последних версиях ОС вместо командной строки будет написано Power Shell. Набираем «Файл»-«Запустить Power Shell».
Далее прописываем команду CHKDSK /G (указываете букву накопителя). Далее соглашаемся на разблокировку (пишем «Y», нажимаем клавишу «Enter»). Ждем окончания работы. Утилита проверит диск, исправит ошибки автоматически, или укажет возможные причины неполадки.
Media Creation Tool не запускается
Сбой происходит из-за неправильного распознавания утилиты системой безопасности, которая блокирует подозрительную активность. Отключите антивирус. Например, если установлен Smart Security, нажимаем его иконку правой кнопкой мыши, отключаем антивирус.
Не хватает прав на запуск
Откройте утилиту с правами администратора. Кликните по скачанному файлу правой кнопкой мыши, выберите соответствующий пункт.
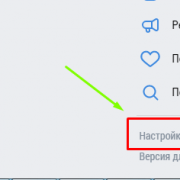
Очистка временных файлов
В адресной строке проводника напишите: %TEMP%. Далее нажимаем «Enter». Откроется папка где находятся временные файлы ПО, которое работало.
Удалите все ее содержимое, перезагрузите ПК. Как сделать проще? Используйте специальный софт. Подробнее об этом прочитайте в статье: «Как работает Wise Registry Cleaner».
Create Installation Media For Another PC Option
If you select ‘Create installation media for another PC option’, then follow the steps given below-
- When you select the option, you will be asked to select the language, edition, and architecture of the Windows you want to install.
- You can click ‘Use the recommended options for this PC,’ if you want the Media creation tool to automatically select the options for the machine. Once done, click on next.

-
Next, you will see two options on the window- ‘USB flash drive,’ and ‘ISO file.’
- USB flash drive- If you select this option, the Windows media creation tool will create a bootable USB drive for you.
- ISO file- If you select this option, the media creation tool will download the ISO file. You will be able to burn the ISO file later to create a bootable USB drive or a DVD.
- If you select the ‘USB flash drive’ option, ensure you connect a USB drive that is at least 8GB in storage. The media creation tool will begin downloading the Windows 11 and will burn it to the USB flash drive automatically.
- If you select the ‘ISO file’ option, the ISO file of Windows 11 will be downloaded. You can later burn it with the help of burning tools like Power ISO. You can use such tools to burn the ISO file to a USB drive.
- Once you have created the bootable USB drive of Windows 11, plug the USB drive into the computer which you want to upgrade to Windows 11.
- After plugging in the USB drive, boot into BIOS and install the Windows.
ALSO READ: How to Upgrade Windows 10 to Windows 11
4 Выборочная установка
После создания установочного носителя необходимо запустить с него компьютер. Перезагрузите его, установив DVD или USB-накопитель
Внимание: «флешка» не должна стоять в порте USB 3.0, поскольку не самые новые системы при запуске его не распознают
Кроме того, при необходимости измените порядок загрузки в BIOS, для того чтобы загрузочный носитель был увиден. Для этого, как правило, необходимо во время запуска нажать на клавишу «F1» или «Del». Какую именно, вы увидите либо на экране-заставке BIOS в самом начале процесса загрузки, либо в руководстве пользователя от разработчика ПК или материнской платы.
После успешного процесса загрузки появится окно установки Windows. В нем выберите язык, нажмите на «Далее», а затем на «Установить сейчас». При запросе ключа введите тот же, что и для прежней версии Windows. На экране «Выберите тип установки» для чистой установки нажмите на второй вариант — «Выборочная: только установка Windows (для опытных пользователей)». Вы увидите таблицу разделов ПК.
Здесь у вас есть возможность выбрать радикальную чистую установку либо создать папку с резервной копией старых программ и файлов. Прежней системой вы в любом случае не сможете пользоваться. Далее мы расскажем об обоих вариантах.
Use Windows Media Creation Tool to Upgrade Your PC
Windows Media Creation Tool is also a Windows upgrade tool as it can upgrade your PC to the latest Windows 10 version. According to many Windows 10 users, using Windows Update to upgrade Windows 10 may encounter some errors like the common Windows 10 update error 0x8007007e, leading to upgrade failure.
In this case, it is highly recommended to utilize Windows 10 Media Creation Tool to upgrade Windows 10. With this Windows upgrade tool, you can quickly upgrade your computer to the latest version of Windows 10. Here are detailed steps and screenshots.
Note: If you intend to upgrade your current computer to Windows 10, make sure it meets the Windows 10 system requirements.
Step 1. Download Windows 10 Media Creation Tool from Microsoft’s official website.
Step 2. Run the Media Creation Tool. To run this tool, you need to be an administrator.
Step 3. On this page, select Accept.
Step 4. Wait patiently for Media Creation Tool to get a few things ready. When it’s done, you can continue.
Step 5. On the What do you want to do page, select Upgrade this PC now, and then click Next.
Step 6. At this time, Media Creation Tool will download some files for updates and then check your PC. This process may take some time. Just wait patiently and it won’t be too long.
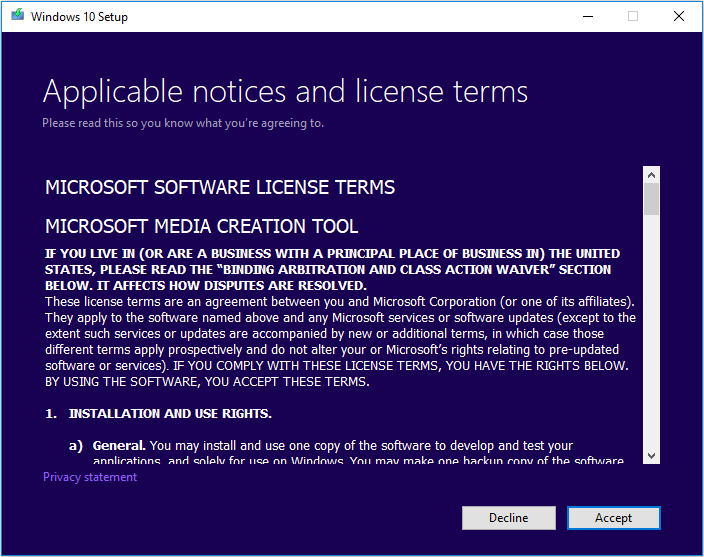
Step 7. Read the license terms and click Accept.
Step 8. Wait for Media Creation Tool to check for updates.
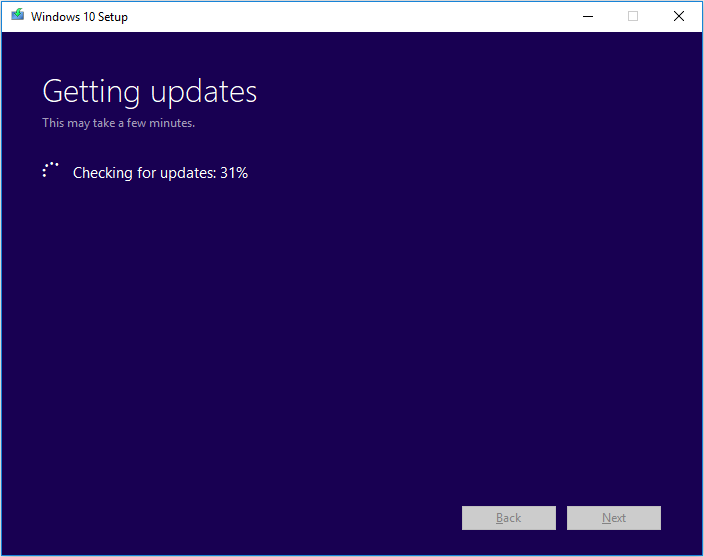
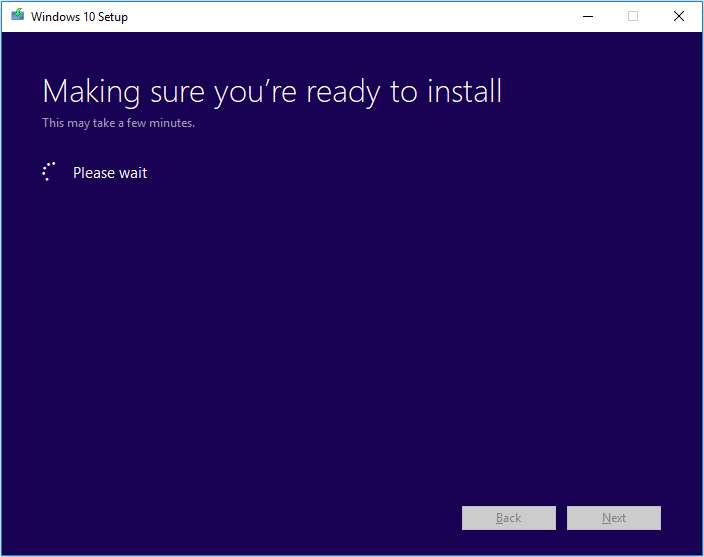
Step 9. Windows 10 Media Creation Tool will check for your PC again and make sure you are ready to install.
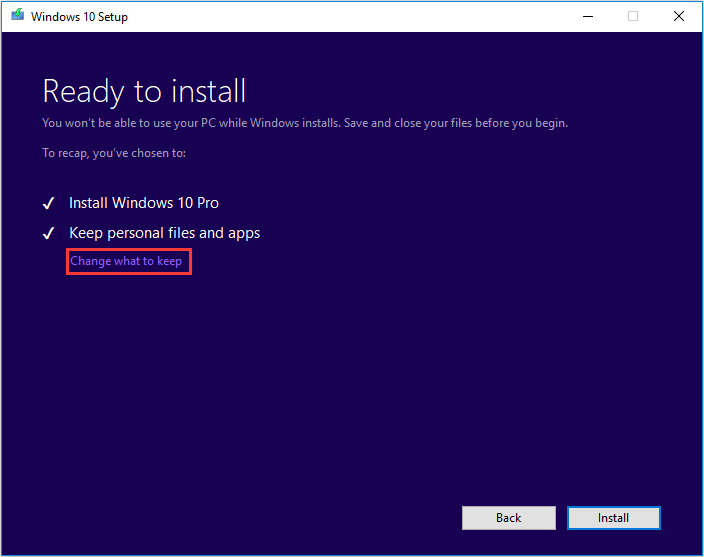
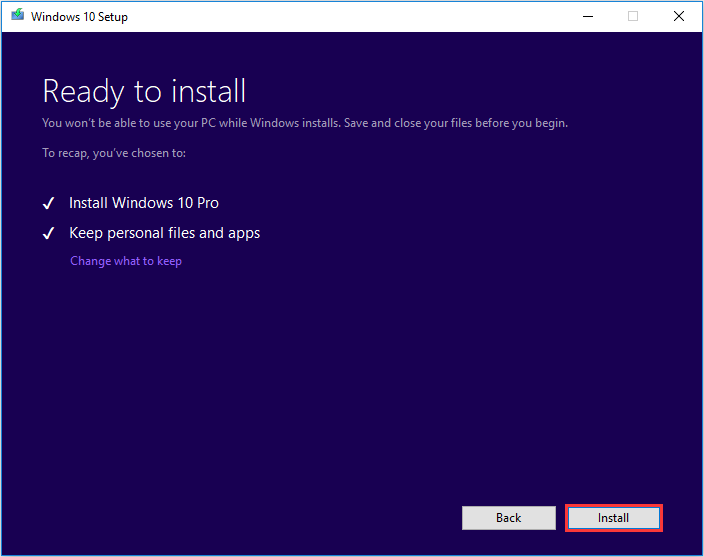
Step 10. When you get this page, you’ll see a recap of what you’ve chosen, and what will be kept through the upgrade. Choose Change what to keep, you can select what to keep by yourself.
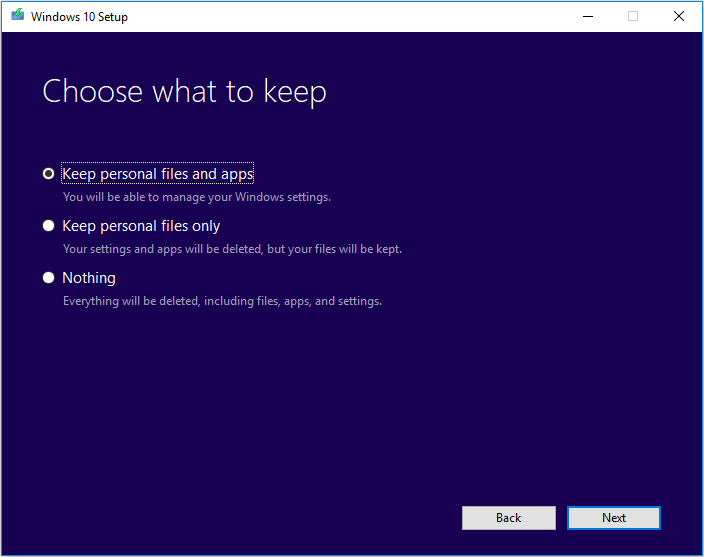
Step 11. Choose whether you would like to Keep personal files and apps, Keep personal files only, or keep Nothing during the upgrade. After selection, then click Next to continue.
Step 12. Close any running applications and when you’re ready, select Install. During the installation, your PC will restart for a few times. Please don’t turn off your PC.
Объяснение: средство создания мультимедиа для Windows 10 (2021 г.)
В этой статье мы сделали акцент на том, как использовать Windows 10 Media Creation Tool для обновления старых ПК или перехода на совершенно новую сборку Windows 10, такую как недавно выпущенное обновление Windows 10 21H1. Так что, если вы понятия не имеете об этом изящном инструменте установки Windows, мы также добавили небольшое объяснение.
Что такое Windows 10 Media Creation Tool?
Windows 10 Media Creation Tool — это официальная утилита от Microsoft для обновления операционной системы Windows до последней сборки Windows 10. Инструмент не ограничен пользователями Windows 10, но пользователи Windows 7, 8 и 8.1 также могут использовать его для обновления до Windows 10, если у них есть подлинная лицензия. А если вы уже используете Windows 10, этот инструмент позволяет установить самую последнюю сборку.
Например, обновление Windows 10 21H1 (май 2021 г.) только что было выпущено, но вы не можете получить его в настройках Windows прямо сейчас. Изначально обновление доступно только небольшому количеству пользователей. Поэтому, если вы хотите попробовать, вам придется вручную установить обновление с помощью Windows 10 Media Creation Tool. Самое приятное то, что он не затрагивает ни один из ваших файлов и легко устанавливает последнюю сборку.
Кроме того, этот инструмент также позволяет создавать установочные носители. Вы можете создать загрузочный USB-накопитель Windows 10 прямо из приложения — без отдельной загрузки ISO-файла. В зависимости от архитектуры и выпуска Windows он автоматически определяет правильную конфигурацию и позволяет создать загрузочную флешку. Если вы хотите, вы также можете загрузить последний ISO-образ Windows 10 с помощью этого инструмента.
Как использовать Windows 10 Media Creation Tool?
Если вы ищете руководство по использованию Windows 10 Media Creation Tool, вы попали в нужное место. В этом руководстве мы сначала объяснили, как обновить текущую сборку Windows 10 с помощью этого инструмента, а затем шаги по созданию установочного носителя (или загрузочного USB-накопителя).
Обновите свой компьютер с помощью Windows 10 Media Creation Tool
1. Во-первых, нажмите на эту ссылку чтобы загрузить Windows 10 Media Creation Tool. После этого установите инструмент. Даже пользователи Windows 7, 8 и 8.1 также могут загрузить этот инструмент для обновления до Windows 10.
2. Затем запустите программу и выберите «Обновить этот компьютер сейчас», если вы хотите выполнить обновление до последней сборки Windows 10.
3. На следующей странице инструмент начнет загрузку Windows 10. Вы можете свернуть окно, так как это займет значительное время в зависимости от вашего подключения к Интернету.
4. После завершения загрузки инструмент проверит все настройки и конфигурации. Как только проверка будет завершена, вам будет предложен вариант, в котором вы можете выбрать, хотите ли вы сохранить свои файлы или установить Windows 10. Я предлагаю вам сохранить свои файлы нетронутыми. Но если вам нужна чистая установка, нажмите на опцию «Изменить то, что нужно сохранить», чтобы выбрать файлы, которые вы хотите удалить.
5. Теперь компьютер перезагрузится, и сразу же начнется установка последней сборки Windows 10. Вот и все. Инструмент создания мультимедиа очень прост в использовании.
Создание загрузочного USB-накопителя Windows 10
1. Вы также можете создать загрузочный USB-накопитель Windows 10 с помощью Windows 10 Media Creation Tool. Просто запустите инструмент и выберите «Создать установочный носитель». После этого нажмите кнопку «Далее».
2. На следующей странице будет предварительно выбрана конфигурация вашего ПК. Если вы хотите изменить его, снимите флажок «Использовать рекомендуемые параметры для этого ПК» и внесите необходимые изменения. После этого нажмите кнопку «Далее».
3. Здесь выберите опцию «Флэш-накопитель USB» и снова нажмите «Далее». Если вы хотите загрузить файл ISO, выберите второй вариант.
4. Теперь вставьте USB-накопитель (не менее 16 ГБ свободного места), и инструмент его обнаружит. Если он не отображается, извлеките флеш-накопитель и снова подключите его. Нажмите кнопку «Далее», как только увидите, что она указана в разделе «Съемные диски».
5. Наконец, он начнет загрузку последней копии Windows 10 и после этого создаст загрузочный USB-накопитель Windows 10. Тебе сейчас не нужно ничего делать.
6. По завершении процесса прошивки извлеките USB-накопитель. Теперь вы можете использовать его для установки Windows 10 на любой компьютер.
Выводы статьи
В бесплатной программе Media Creation Tool можно выполнить обновление Windows 10 до новой версии системы. Программа выполнит все необходимые операции, в итоге, на компьютере будет установлена самая последняя версия Windows 10. При настройках по умолчанию, в обновленной версии системы будут сохранены все данные пользователя и установленные программы.
Обновление Windows 10 в Media Creation Tool (видео)
Похожие публикации:
- Сравнение версий Windows 10: таблица
- Как отключить или удалить OneDrive в Windows 10
- Диск восстановления Windows 10
- Как установить русский язык в Windows 10 — 2 способа
- Индекс производительности Windows 10 — 5 способов